We've had this cooktop since we re-did the kitchen in 2008. A few months
back it developed a crack. Recently, the front right burner stopped working.
I ordered a replacement burner, and thought to install it last Saturday.
I'd done this before (with a different burner) and was overconfident; I removed
the cooktop from its recess in the countertop and, long story short, it experienced
sudden deceleration upon impact. Instead of one crack I now had, well…
7:15 AM
Right. I didn't replace the burner last weekend, because I discovered
why it was dead: stuff had literally fallen through the crack, which now
was a hole, and interacted unfavorably with the burner element.
More on this below.
Anyway, the first thing to do is turn off the power:
7:43 AM
After flipping the breaker off, I ensured there was no juice
by turning on a burner and verifying that the power indicator
didn't illuminate.
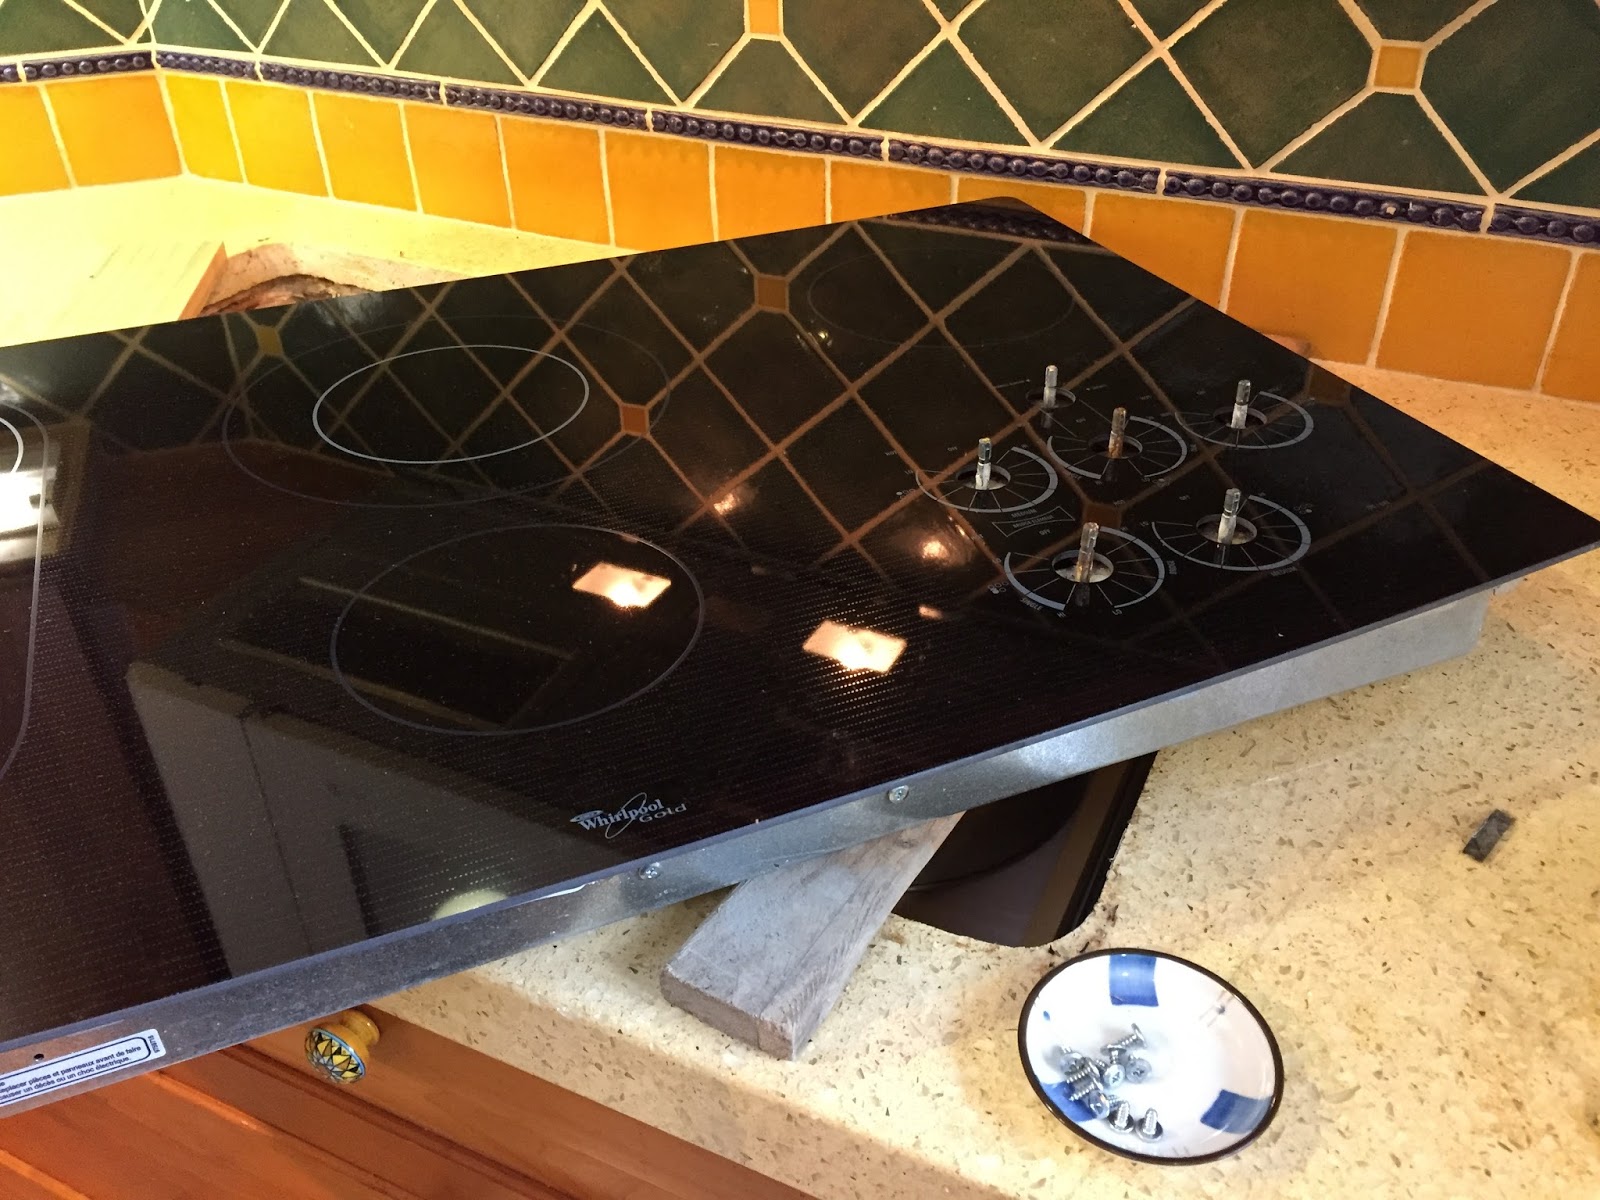
Next, I pulled the cooktop from its recess in the countertop.
I opened the drawer (knob(s) visible in the picture below) and
pushed up on it, then manhandled it out of the hole, placing
a piece of scrap wood under it. You can see in the photo that
the crack is especially pronounced.
7:47 AM
The glass top is held on with eight (8) "Phillips" head screws, three on
the long sides and two on the short sides. The picture below shows
two of the screws (well, one hole and one screw) on the rear edge of
the cooktop:
7:52 AM
Fortunately, the glass isn't all that heavy. I lifted it off and
set it aside. Here's what the range looks like without the top.
Note the small dish in the foreground, where I stashed the screws.
7:53 AM
Here are the two damaged burners. "Wait," you may be thinking,
"you only mentioned one bad burner!"
You're right; we hadn't noticed the rear burner was bad.
Well, it wasn't all bad; you see, the rear burner is a sort of
dual burner; you can heat up only the center part, or you can
turn on the whole thing. It was the outer, torus-shaped
part that was damaged. Details of the damage are shown
later on.
7:55 AM
Then I removed the front burner. Notice that no fewer than four wires are
connected to this thing! That's because it has a temperature sensor
in addition to the heater. When the surface is hot, an indicator
lights up to warn you.
Anyway, I took a photo so I could be sure to put the wires on the
right place when installing the new burner:
7:55 AM
Once the wires are disconnected, the burner basically lifts out; it's held
in place by these, umm, brackets?
Anyway, here's the old one.
7:57 AM
And here's the new one, which doesn't come with its own
brackets; I moved the old brackets onto the new one.
Since I moved them one at a time, a photo wasn't strictly
necessary (as I thought it was for the wires), but still:
7:58 AM
The next two photos give some detail of the damage to the burners.
The damage to the front burner is extensive.
8:00 AM
Damage to the outer part of the rear burner isn't quite so bad, but
methinks it's enough to make the outer burner not work:
8:00 AM
The wiring for the rear burner is a little more complicated than
for the front burner:
8:01 AM
Undersides of both rear burners. Same deal: the "brackets" need to
be moved from the old burner to the new.
8:04 AM
Here's a pic of the two new burners, installed.
8:10 AM
The new glass top is black, for two reasons: first, I could find one
in stock at appliance parts pros (I think repairclinic.com also had one),
whereas a white one would be back-ordered.
Second, as you might guess, the white glass top is very hard to
keep clean-looking. Some stuff just doesn't come off. This one
might not be any easier to keep clean, but it won't look as bad when it's
not.
Here it is, before I screwed it on. Dad always told me to start
all screws before fastening any, but I made an exception for the
toughest-to-reach screw on the rear edge. From this picture,
you can imagine how annoying it is; I only wanted to put the
screwdriver in that position once. (I suppose I could have started
the other 7 screws, and done that screw last, but I didn't think
of that 'til now.)
8:12 AM
The new glass didn't come with the rubber grommets/washers/bushings/whatever
for the control shafts. I transfered them from the old glass:
8:13 AM
It also didn't come with knobs. I could have bought new black knobs,
but maybe the white-on-black look won't be so bad.
8:20 AM
Here it is, with knobs on and eased back into its recess in the counter.
It doesn't look half bad, if I do say so myself:
8:22 AM
And now, turn the power back on:
8:23 AM


No comments:
Post a Comment